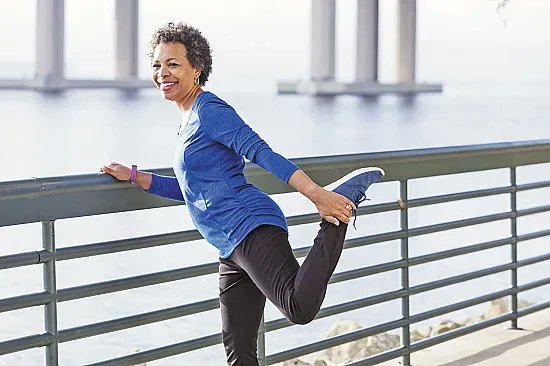
It’s never too late to improve your golf swing. Our Mayo Clinic experts have the stretches to take your game to the next level:
Golf stretches can help get you ready for a day on the golf course. These golf stretches may help promote a fluid, full golf swing, which can improve your performance.
Warmup golf stretches
Before you start your golf stretches, you may want to warm up with 5 to 10 minutes of light activity, such as walking around the practice tee. If you have time, finish the full series of golf stretches found here. Hold each stretch for about 30 seconds.
Doing a single stretch one time is helpful. Do one set of golf stretches every day and another set before and after each round of golf.
Remember: Keep stretching gentle. Don’t bounce. If you feel pain, you’ve stretched too far.
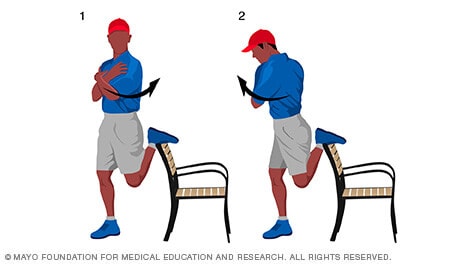
Golf stretches for the quadriceps
Start off your golf stretches by first stretching the quadriceps. Quadriceps are the muscles in the front of the thighs. Start with this stretch:
- Stand with your back to a chair or bench and cross your arms over your chest. Place your left foot on the bench, as shown in image 1. You can use a chair or bench with a lower seat than the one shown here.
- Keep your left knee even with or behind your right knee. Tighten the left buttock muscles. You’ll feel a stretch in the front of your left thigh.
- To mimic your backswing, rotate your shoulders and torso to the right and bend your left shoulder and trunk slightly toward the ground, as shown in image 2.
- Repeat the stretch on the opposite side.
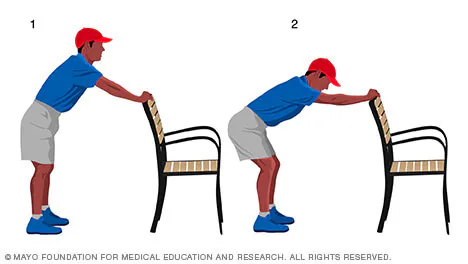
Golf stretches for the back
Next, stretch the back muscles:
- Stand with your feet apart, facing the back of a chair or bench.
- Grasp the back of the bench with your hands, as shown in image 1.
- Hold on to the bench and keep your spine straight. Move your body down and away from your hands until you feel a stretch near both armpits, as shown in image 2.
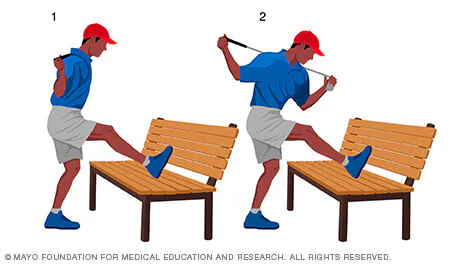
Golf stretches for the hamstrings
Now move on to the hamstrings. Hamstrings are the muscles in the back of the thighs. To do this stretch:
- Hold your golf club behind your shoulders. Stand next to a step, low table or bench. Put your right foot on the bench and bend your right knee slightly, as shown in image 1.
- Bend your upper body forward at your hips. Keep your spine straight until you feel a comfortable stretch in the back of your right thigh.
- Hold this stretch while rotating your back and shoulders to the left and to the right, as shown in image 2.
- Repeat the stretch on the opposite side.
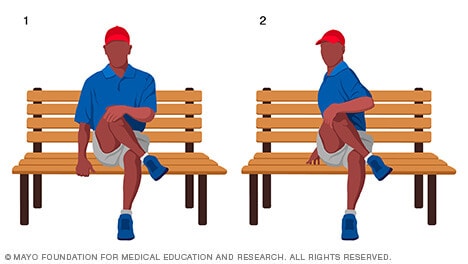
Golf stretches for the hips while seated
You can stretch your hips many ways. Try this seated stretch first:
- Sit on a chair, low table or bench. Place your right ankle on top of your left thigh, as shown in image 1.
- Push down on your right knee with your right forearm. Then lean forward at your waist until you feel a gentle stretch in your right hip, as shown in image 2.
- Repeat the stretch on the opposite side.

Golf stretches for the hips and back
Try this hip and back stretch:
- Sit on a chair, low table or bench. Place your right ankle on top of your left thigh. Raise your right knee and grasp it with your left hand, as shown in image 1.
- Keeping your spine straight, pull your right knee up toward your left shoulder. You’ll feel a stretch in your right buttock.
- Mimic the position of your right hip when you’re at the top of your backswing by turning your shoulders to the right as shown in image 2.
- Repeat the stretch on the opposite side.
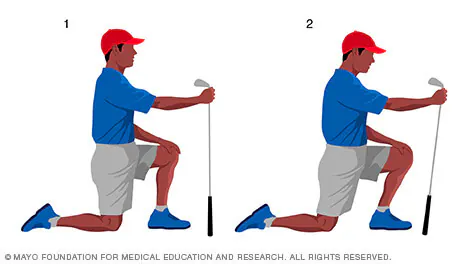
Golf stretches for the front hip muscles
Here’s a final hip stretch:
- Kneel on your right knee and hold your golf club with your right hand. Place your left foot in front of you and bend your knee. Place your left hand on your left leg for stability, as shown in image 1.
- Keep your back straight and abdominal muscles tight. Then lean forward, shifting more weight onto your left leg, as shown in image 2. You’ll feel a stretch in the front of your right hip and thigh.
- Repeat the stretch on the opposite side.
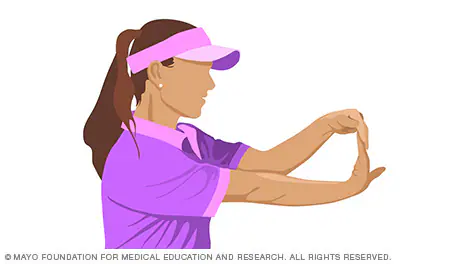
Golf stretches for the wrists
Now stretch your wrists upward:
- Hold your right arm in front of you with your palm facing down.
- Keep your elbow straight and gently pull your wrist up by grabbing the top of your fingers with your left hand.
- Repeat the stretch on the opposite side.
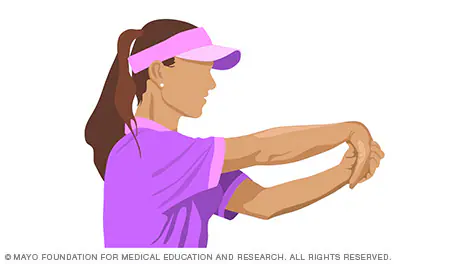
More golf stretches for the wrists
Stretch your wrists downward too:
- Hold your right arm in front of you with your palm facing down.
- Keep your elbow straight and gently pull your wrist down with your left hand. You’ll feel the stretch in your right forearm and wrist.
- Repeat the stretch on the opposite side.
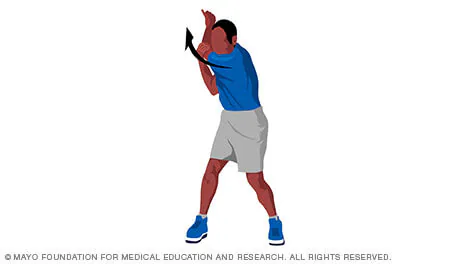
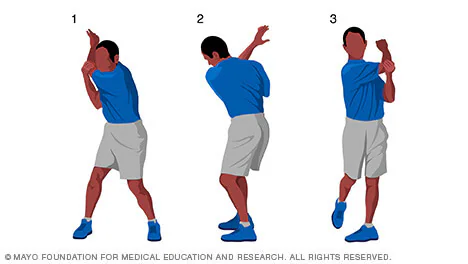
Golf stretches for the shoulders
Next stretch your shoulders:
- Stand with your feet shoulder-width apart as though you’re getting ready to hit the golf ball. Hold your left elbow with your right hand, as shown in image 1.
- Keeping your left thumb pointed up, bend your left wrist toward your left thumb.
- Rotate your trunk to the right.
- Pull on your left elbow until you feel a stretch in your back, as shown in image 2.
- To stretch your trailing shoulder — the right shoulder — grab your right elbow with your left hand. Then rotate your trunk to the left, as shown in image 3.
Golf stretches for the core muscles
Finally, stretch the core muscles:
- Stand with your feet shoulder-width apart, and fold your arms across your chest, as shown in image 1.
- Bend your knees and lean forward slightly, as shown in image 2.
- Rotate your trunk in your backswing motion, as shown in image 3.
- Continue from the top of your backswing position to your follow-through, as shown in image 4.
- At home, you may want to try this stretch in front of a mirror to check the different positions of your swing.
Originally published on Mayo Clinic